
So.
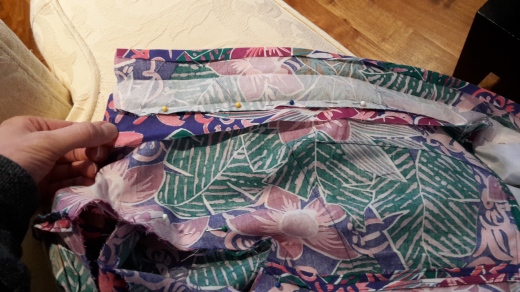
As usual, when I was home home for Christmas I went for a raid through my mum’s fabric stash. This time I found this crazy brightly coloured, retro print floral number, and felt sorry that it had been left to wallow with the other forgotten fabrics.
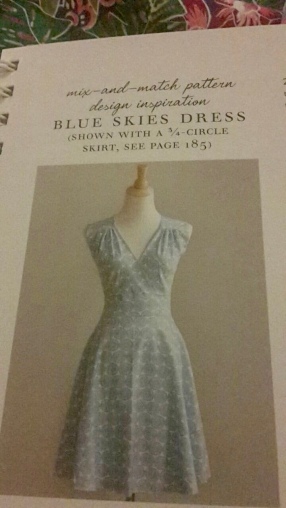
For Christmas, Mama Bear gave me a new pattern book called “Sew Many Dresses Sew Little Time” (thank you Mama) and the concept of the book is that you make a basic bodice and skirt to fit your measurements and then you can interchange loads of different tops and bottoms. It also gives you ways to adapt the patterns like adding gathers at shoulder, a wrap element, different collar styles etc.
I decided in my post Christmas making madness (we’ve all been there) to choose my favourite and leap straight in with a pattern variation without checking fit or really thinking anything about it. This may have been an error.
So what I was aiming for was this:
And I did all the fun cutting and sticking and had a blast…

..and somehow ended up with a terrible, terrible mess.
Given that I knew that I had a pattern for a similar dress back in London, I resolved to abandon the current pattern and compare the two to see where I went wrong .
So. Round 2. Shirt dress.
Before I start, HAIKU TIME:
Retro print fabric,
Smoothly assembled shirt dress,
BUTTON HOLE FOOT PLEASE 😥

Now I’ve made a shirt before, so all the fun collar and collar stand faff wasn’t as fazing as the gathers above, and, with the wonderful aid of Mama Bear, I altered the basic bodice to create a beautifully fitting delight.
For me that means extending back darts to make them much longer and adjusting the angle of the bust darts so they actually aligned with the right inny and outy bits of me.

Toile done, it was time to cut ! The bodice went together very smoothly….

However, as it turned out I had in fact misread the instructions (you may notice Rushing Rosie is a theme of this post) and I’d messed up the seam allowance when attaching button placket pattern pieces onto the bodice front pattern pieces. And I’d actually added an extra 1.5cm seam allowance on each side.
However, having fixed that, something still wasn’t right, as now collar stand was in fact too short for the neck of the bodice ….

So rather than doing the sensible thing and re-cutting the collar (because I had already assembled it and had a severe attack of the lazies), I instead slightly tweaked my bodice by sloping the button plackets slightly away from the centre and lightly taking in the inside edge of the shoulder to reduce length. That in fact solved my problem (yes we’re all surprised that gigantic fudge came off).
Ta daaah! She was attached!
From there, there was just the skirt and lining to attach and ALL THE TOP STITCHING TO DO (I do so loathe to top stitch).
Skirt was created and lining inserted (and sneakily attached to the button plackets)
![20180203_152223[1]](https://haberdasheryhaiku.wordpress.com/wp-content/uploads/2018/03/20180203_1522231.jpg?w=267&h=476)
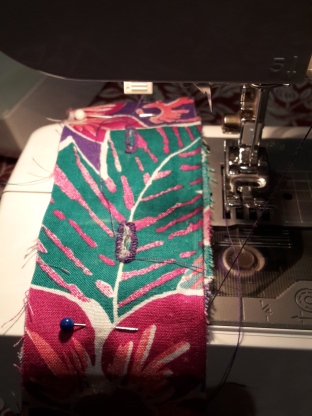
All went smoothly bar a few disagreements with my machine about tension (on my side I thought there should be some but machine seemed to think not…), I even made some bias binding for the bodice skirt seam, because apparently I was feeling fancy at the time.

FINAL step.
Rosie V Buttonholes – the showdown.
Being honest – it did not go well. My machine was not playing ball. I have a very basic 5 stitch Brother sewing machine and I don’t have a buttonhole foot (I know, I know). So as any rational make-do-and-mend-er would – I repeatedly tried without. Then finally abandoned and decided to use someone else’s machine….
So a trip to the Sewcialising event at the Village Haberdashery and low and behold, 12 beautiful button holes with zero stress and VERY minimal effort. Magic.

Button holes done, buttons sewn on and here it is in all its bold multicoloured glory!

All in all I was pretty happy with this make, however, a couple of things I would do differently if I did it again.
- I actually didn’t like that the pattern didn’t have a yolk. I know it made construction way easier, but realistically, it makes it more hard-wearing, all your top seams are enclosed…. I just like yolks.
- I also have regrets about interfacing the button plackets, I know I was supposed to, but it’s now just a little too stiff for my liking. Hopefully it will soften in the wash ….
- BUT nonetheless I am VERY happy with this make. It’s that warm fuzzy feeling of using some fabric that otherwise would have sat gathering dust for many more moons. Even if it is a
vilebold retro print
Lessons learnt:
- READ THE INSTRUCTIONS YOU FOOL. Past Rosie really should do that sometimes.
- Don’t be afraid to make the pattern how you think you should – if you want a yolk, add a yolk.
- Check the assembly before committing to top stitching a button placket.
- Buy a button hole foot, it really is worth it, for the sake of sanity.
Rosie over and out
x


